Hey there! If you’ve ever spent time tinkering with metal parts—whether you’re a weekend DIY warrior, a small-time contractor, or even someone who just has a bunch of random threaded rods and metal nuts lying around the garage—you know there’s a right way and a wrong way to put those two together. I’ve been in the metal nut game for over a decade now, so I’ve seen it all: folks cross-threading a nut and ruining a perfectly good rod, over-tightening until the nut cracks, or just skipping a simple step that makes the whole job last way longer. Today, I’m breaking down exactly how to install a metal nut on a threaded rod the smart way—plus, a few pro tips from a supplier’s perspective that you won’t find in a basic YouTube tutorial. Metal Nut
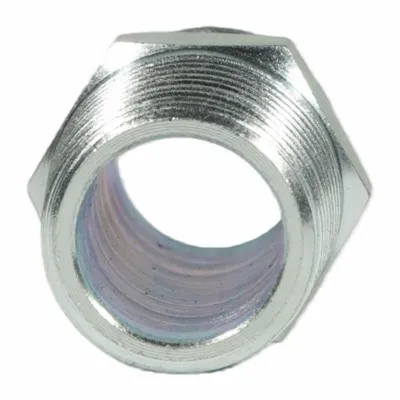
First off, let’s get one thing straight: not all metal nuts are made equal. As someone who supplies these parts, I can tell you that grabbing any random nut from your junk drawer might work for a quick fix, but if you want something durable, you need to match the nut to the rod. Thread pitch is the big one here. Thread pitch is basically the distance between each thread on the rod, right? If the pitch is off—like trying to put a coarse-threaded nut on a fine-threaded rod—you’re not just going to struggle; you’re going to damage both parts. I can’t tell you how many times I’ve gotten an email from a customer saying “your nuts don’t fit my rod” only to realize they grabbed a nut with a different pitch. It’s always the first thing I ask about when someone reaches out to us.
Okay, let’s start with the tools you’ll need. You don’t need a fancy workshop full of gear, but having the right stuff makes a huge difference. First, of course, is your metal nut and threaded rod. Make sure they’re clean—grime, rust, or old grease on either will mess up the fit and make it hard to turn the nut. Next, you’ll need a wrench (either open-end or box-end) that fits the nut perfectly. If the wrench is too small, it’ll slip and round off the nut’s edges; too big, and you can’t apply enough torque. A socket wrench works too, especially for nuts in tight spots, but just make sure the socket is the right size. Maybe a little thread-locking compound if you want the nut to stay put (great for things like shelf brackets or fence posts that get jostled). And if you’re working on something bigger, a torque wrench is a lifesaver—over-tightening is the #1 cause of broken metal nuts, trust me.
Now, the actual installation step. First, prep both parts. Like I said, clean them! Take a wire brush or a rag with some degreaser and scrub the threads on the rod and the inside of the nut. Even a tiny bit of dust can cause friction and wear over time. If the rod has a little bit of surface rust, a quick sandpaper rub will smooth that out—no need for heavy stuff, just enough to get rid of loose rust.
Next, start the nut by hand. This is the part a lot of people rush, and it’s where cross-threading happens. Hold the rod steady (clamping it in a vise is a good idea if you have one—no one wants a wobbly rod while they’re working). Then, line up the first thread of the nut exactly with the first thread on the rod. Don’t force it! If it’s not turning smoothly by hand, that’s a dead giveaway you’re off. Gently twist the nut clockwise, using only your fingers, until it’s a few turns on. If it gets stuck, back it off and try again—forcing it will ruin the threads, and then both parts are useless. I’ve had customers bring back nuts with stripped threads because they skipped this step, and it’s so avoidable.
Once the nut is started by hand, you can grab your wrench. Start turning it slowly, applying even pressure. Don’t crank down right away—let the threads seat themselves properly. How tight should you go? Well, that depends on the job. For general purposes, you want it snug, but not so tight that the metal deforms. If you’re using a torque wrench, follow the manufacturer’s specs for the grade of nut and rod (we usually include a little tech sheet with each bulk order that has these numbers). If you don’t have a torque wrench, stop as soon as you feel resistance—any more, and you risk stripping the nut or snapping the rod. Oh, and if you used thread-locking compound, make sure to let it cure for the recommended time (usually 24 hours) before putting the item to use.
Wait, let’s talk about common mistakes I see all the time. First, cross-threading. We’ve all been there—you’re in a hurry, start the nut crookedly, and by the time you realize, you’ve already gouged the threads. If that happens, don’t just keep forcing it. Back it off, clean the threads, and start over. Sometimes, a little file on the damaged threads can fix it, but if it’s bad, it’s better to replace the nut and rod than to have a wobbly, unsafe fix. Second, over-tightening. A lot of folks think “if a little is good, more is better,” but metal nuts have a breaking point. We supply nuts in different grades—like carbon steel for general use, stainless steel for outdoor stuff, and alloy steel for heavy-duty jobs. Using a grade that’s too low for the job is another mistake. A stainless steel nut on a heavy deck rail might snap under the weight over time. That’s why it’s important to pick the right nut for the application, not just the cheapest one.
Another thing: if you’re installing a nut on a threaded rod that’s going to be outside, or in a damp environment, make sure the nut and rod are both rust-resistant. Stainless steel is a great call here, or even zinc-plated steel if you’re on a budget. We get a lot of repeat orders from construction companies that use our zinc-plated nuts for fence projects, and they tell us they haven’t had to replace a nut due to rust in years. It’s a small step, but it makes a huge difference in longevity.
Let’s do a quick test to make sure you did it right. After tightening, wiggle the nut a little—if it moves, it’s not tight enough. If it’s fixed in place and doesn’t budge when you push or pull, that’s a good sign. Also, check the threads on the nut and rod after installing—you shouldn’t see any exposed thread between the nut and the surface it’s against (that’s called “protrusion,” and if it’s too much, it can cause the nut to come loose over time). For most jobs, a half-inch to an inch of thread showing past the nut is enough.
Now, a little pitch from the supplier side. If you’re a contractor, DIYer, or business owner who needs metal nuts for bulk orders, we’ve got you covered. We stock all sorts of grades, sizes, and finishes—from tiny M3 nuts for electronics to heavy-duty 1-inch nuts for construction. All our nuts are precision-machined to ensure consistent thread pitch, so you won’t get that frustrating “your nuts don’t fit my rod” problem we talked about earlier. We also offer custom sizes if you have a unique project, and our team can help you pick the right nut for your specific application—no generic advice, just real, hands-on knowledge from people who work with these parts every single day.
If you’re tired of dealing with ill-fitting nuts that strip too easily, or rusting out after a few months, reach out to us to chat about your needs. We’re not just a supplier—we’re a group of folks who know how important it is for parts to work right the first time, whether you’re building a bookshelf or a commercial building. Just send us a message, tell us what you’re working on, and we can help you get the right nuts, tools, and tips to make your project go smoothly.
Wait, one last pro tip I learned a while back: if you’re working with threaded rods that are really long, or in a tight space, you can start the nut with a little twist of the rod itself. Hold the rod with one hand, the nut with the other, and turn the rod clockwise while holding the nut steady. This is easier than turning a long rod with a wrench, and it reduces the chance of cross-threading too. Give it a shot next time you’re in a tight spot.
At the end of the day, installing a metal nut on a threaded rod isn’t rocket science, but it does pay to do it right. Rushing the step of starting the nut by hand, using the wrong thread pitch, or over-tightening can lead to headaches down the line—stripped parts, wobbly structures, even safety issues. As someone who’s been in this business for years, I’d rather see a customer take a little extra time to do it right and come back for more nuts for their next project, than cut corners and have a bad experience.

So next time you’re reaching for a nut and rod, remember: clean them first, start the nut by hand to avoid cross-threading, use the right tool for tightening, and pick a nut grade that matches your job. And if you need help with any part of that, don’t hesitate to get in touch. We’re here to make sure your projects stay strong, safe, and easy to build.
Shaft References:
- Machinery’s Handbook, 31st Edition, Industrial Press Inc., 2020
- ASME B18.2.6-2016, Standard Specification for General Purpose Threaded Rods and Studs
Kunshan Haizhijie Precision Hardware Co., Ltd.
As one of the most professional metal nut manufacturers and suppliers in China, we’re featured by quality products and good price. Please rest assured to buy customized metal nut made in China here from our factory. Also, pricelist is available.
Address: No. 367, Kangzhuang Road, Zhou City Town, Kunshan City, Jiangsu Province, China
E-mail: wzhshui@sina.com
WebSite: https://www.hzhjmetal.com/
